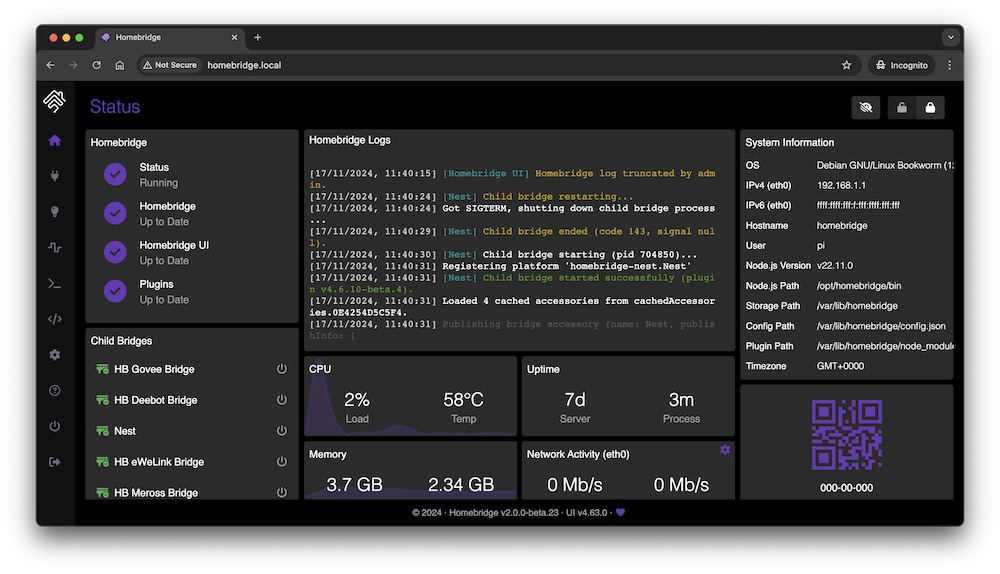
You have lights from one brand, a thermostat from another, Ring cameras that do not have the HomeKit seal and you want to see everything in the app you already use every day: Home on the iPhone, automations with Siri or the door feed on Apple TV. That scenario—fragmented home automation across ecosystems—is exactly what Homebridge was born for. It does not replace Apple, Google or Samsung: it acts as a translator on your local network. You set up a mini-server, install a plugin by manufacturer and, minutes later, accessories that the Home app would not recognize natively appear as if they were HomeKit from the factory. In this guide we go over the complete flow: choosing hardware, installing the server, configuring plugins (with Ring as a real example), pairing with Apple Home and what to do if your favorite app is Google Home or Samsung SmartThings.
Video: install and configure Homebridge on Raspberry Pi
Step-by-step tutorial: image for Raspberry Pi, web panel, plugins and pairing with the Casa app. Source: YouTube
What Homebridge does (and doesn't)
Homebridge is open source software written in Node.js that emulates the HomeKit Accessory Protocol (HAP). Plugins—community modules in NPM—connect third-party APIs (Ring, Nest, Roborock, Tuya plugs...) with that virtual bridge. Apple sees a “HomeKit accessory”; There is actually a server in your house talking to the manufacturer's cloud.
Since version 2, some plugins can also expose devices via Matter, which opens the door to controllers such as Google Home or SmartThings without necessarily going through Apple. But the classic use case—and the one that works best today—is still Apple Home + Siri + Apple TV as a hub.
What Homebridge is not: a substitute for the official Google or Samsung hub, nor a guarantee of stability equal to a certified product. If the server is turned off, the accessories disappear from Home. If Ring changes its API, it may take days for the plugin to update. It is advisable to assume it as an advanced, very powerful solution, with maintenance responsibility.
What you need before you start
- An always-on device on the same Wi-Fi/Ethernet network as your accessories. The most common: Raspberry Pi 4/5 (official Homebridge image), an old Mac mini, a NAS with Docker or a Linux mini PC.
- Stable network. The server and iPhone must be on the same LAN for initial pairing; Then, with a hub (Apple TV or HomePod), you can control outside the home.
- Manufacturer accounts — Ring, Nest, etc. — with 2FA activated; Almost all plugins ask for a login or refresh token.
- An iPhone or iPad with the Home app to scan the Homebridge panel QR.
- Optional but recommended: Apple TV 4K or HomePod as a home hub for automations, camera notifications, and secure remote access.
Step 1 — Install Homebridge Server
The quickest way for beginners is the preconfigured image for Raspberry Pi: you download the file, you flash it with Balena Etcher to a microSD, you boot up and in a few minutes you have the Wi-Fi Setup and the panel ready. The official wiki also covers macOS, Docker, Synology, Unraid and Windows.
On macOS or Linux "by hand", the summarized flow is:
- Install Node.js LTS (v22 on wiki June 2026).
- Run
sudo npm install -g --unsafe-perm homebridge homebridge-config-ui-x. - Register the service with
sudo hb-service installso that it starts when you turn on the computer. - Open http://localhost:8581 (or the local IP of the server, e.g.
192.168.1.77:8581).
Default panel credentials: user admin, password admin — change them on first access. The configuration file lives in ~/.homebridge/config.json; the UI avoids editing it by hand in most cases.
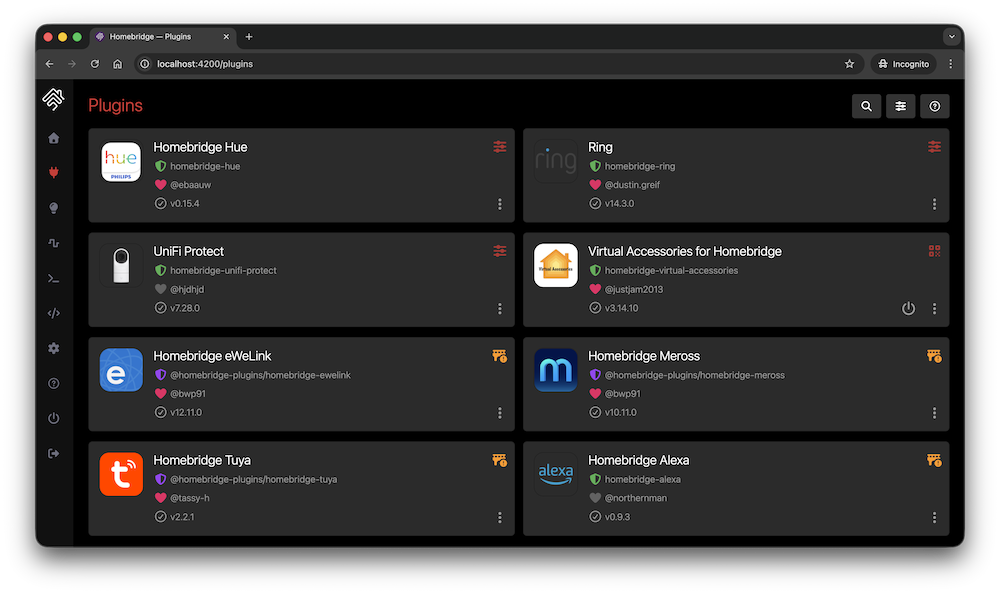
Step 2 — Install plugins for your devices
In the panel, Plugins tab, look for the manufacturer. The search engine queries NPM for the homebridge-plugin tag. Popular examples:
- homebridge-ring (dgreif) — Ring doorbells, cameras, alarms and lights.
- homebridge-nest — Nest thermostats.
- homebridge-tuya — Tuya/Smart Life plugs and light bulbs.
- homebridge-roborock — Roborock vacuum cleaner robots.
- homebridge-wol — turn on PCs over the network (Wake-on-LAN).
After installing, the UI usually opens a setup wizard. Save, press Restart Homebridge (top right) and check the Logs tab if something goes wrong. With heavy plugins (cameras), activate a child bridge: a separate HomeKit bridge per plugin so that a failure does not bring down the entire server.
Video: general guide to Homebridge and Casa app
Review of the complete flow: Raspberry Pi image, plugins, account setup and QR scanning at Home. Source: YouTube
Step 3 — Real example: Ring cameras on Apple Home
Ring belongs to Amazon and does not offer native HomeKit compatibility. However, the homebridge-ring plugin is one of the most maintained in the ecosystem: it supports doorbells, battery-powered cameras, Ring alarms, and smart lights. It's the same path that many users — including the writer of this guide — use to watch the entrance video on the iPhone and Apple TV without waiting for an official certification that Ring has not announced.
Typical configuration:
- In Plugins, install Ring by dgreif.
- In the wizard, sign in with your Ring account (email + password + 2FA code). The UI can generate a refresh token to not save the key in plain text.
- Select which devices to import (cameras, motion sensors, doorbell).
- Restart Homebridge. In Logs you should see each camera registered as an accessory.
- For live video with two-way audio, the plugin uses
ffmpeg; on most platforms it installsffmpeg-for-homebridgeautomatically.
In the Home app, each camera appears as HomeKit Camera: thumbnail when you open the room, stream when you tap, motion notifications if you have a hub and the appropriate iCloud+ plan. On Apple TV (tvOS 16+), go to Home → Cameras to view tiles or full screen — the same stream as with a certified Floodlight Pro, except the stream goes through your local server.
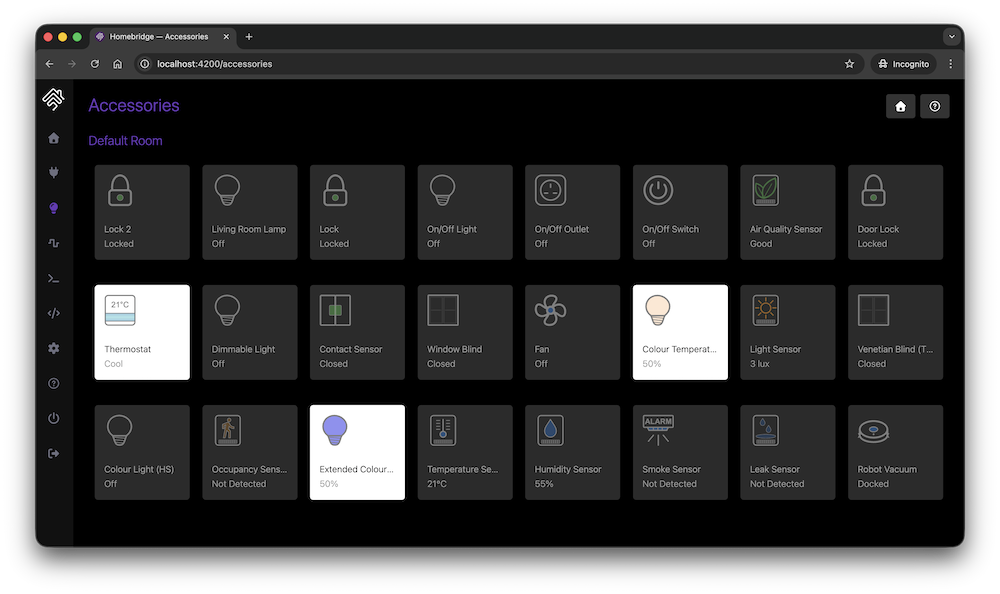
Honest Limitations: Battery-powered cameras have snapshot restrictions; the plugin documents Snapshot Limitations. If Ring changes its API, there may be temporary interruptions. It is not the same as a "Works with Apple Home" product sealed by Apple, but in practice it covers surveillance, automations ("if it detects motion, turns on the porch light") and a TV viewer.
Step 4 — Pair Homebridge with the Casa app
When the server is green and plugins loaded:
- Open the Home app on your iPhone or iPad.
- Press + → Add accessory → More options... (if it doesn't detect itself).
- Scan the QR code displayed on the Homebridge tab of the panel (or that of a specific child bridge).
- Confirm that you trust the bridge; assigns rooms and names.
If you have many accessories, Apple recommends dividing them into several child bridges to avoid exceeding the hub's memory limits. Each bridge generates its own QR. Once added, control from iPhone, Apple Watch, Mac, Siri and – with Apple TV or HomePod as the center – also outside the home.
What if your favorite app is Google Home or Samsung SmartThings?
We must be clear: Homebridge is optimized for Apple Home. Don't install Homebridge expecting Google Home to automatically discover all your plugins; that is not the main flow.
If you want to unify devices on Google Home or Samsung SmartThings, the strongest routes in 2026 are:
- Matter: multi-ecosystem standard. Buy Matter accessories when you can; They natively pair with Apple, Google and Samsung. Homebridge v2 may expose some plugins as Matter devices, but adoption is still uneven by plugin.
- Home Assistant: universal home automation server. It integrates almost everything (Ring, Tuya, Zigbee, MQTT...) and offers bridges to HomeKit, Google Assistant and SmartThings. Many power users migrate from Homebridge to HA as their home grows.
- Hubitat / Homey: commercial hubs with extensive integrations and their own mobile apps, some with export to HomeKit or Google.
- Scrypted: very popular alternative specific to cameras with efficient relay to HomeKit Secure Video.
Video: beyond HomeKit — Homebridge, Scrypted and Home Assistant
Comparison of Homebridge, Scrypted and Home Assistant to expand Apple Home without giving up the ecosystem. Source: YouTube
Practical strategy: If you already live on iPhone + Apple TV, Homebridge solves 80% (Ring, cheap plugs, vacuum cleaners). If at home you mix Android and Google Nest Hub, consider Home Assistant as a single brain and, if you want Siri, activate its experimental HomeKit bridge. If you only buy new hardware, prioritize Matter and avoid homemade servers.
Maintenance tips
- Backups: UI includes Backup/Restore of
config.jsonand tokens. Save them before updating plugins. - Updates: Review the dashboard every few weeks; cloud plugins (Ring, Google) break compatibility more often than Homebridge core.
- UPS or Pi with battery: a power outage leaves doorbells and cameras at Home inaccessible until the server returns.
- Separate IoT network (optional): VLAN for cheap devices; Homebridge needs routes to them and to the internet.
- Do not share the panel on the internet without HTTPS and strong authentication; exposes control of your house.
In summary
Homebridge turns a mini PC into the translator that Apple does not include as standard: you install the server, add plugins, scan a QR and your devices—from Ring cameras to non-certified plugs—appear in Home, respond to Siri and, with Apple TV as a hub, you can see the door on TV. It's not plug-and-play at the level of a Matter sensor, but it is the most mature and documented solution for Apple Home in 2026.
If your goal is Google Home or SmartThings, consider Matter on new hardware or Home Assistant as a central hub. If you're already invested in Apple and are just missing those "rogue" cameras or plugs, Homebridge is still the most direct shortcut — as long as you agree to keep a server up and up to date. The code is free, the community is huge, and the panel at homebridge.io takes you from zero to “Hey Siri, show me the garage camera” in an afternoon.
Most read
What readers are engaging with right now.
- Culture
Goose, the gay app that competes with Grindr, reaches the top 4 of Lifestyle in the App Store
- World
Cubans protest in Miami against Airlines Connections for alleged scam: they demand up to $20,000 in packages to Punta Cana

- World
Trump declares the ceasefire with Iran over, orders new attacks in Hormuz and demands cutting trade with Spain in NATO

- Culture
Harry Potter on HBO: complete guide to the series (not yet released and already renewed for T2), dates, cast and controversies

- Culture
DUK App: Aly Sánchez launches her habits app "one day at a time" with a 63-day program
- Culture
I'm Edgy and Edgy Labs: From Nebraska's Walmart to a beef tallow cream brand that sells across the US.

- Culture
The Evening of the Year VI: all the winners, fights and performances of the Ibai night in Seville

- World
The FBI is investigating the AFA for alleged fraud and money laundering: about $300 million in sponsorships and operations in the US.

- World
El Cangrejo: profile of Raúl Guillermo Rodríguez Castro, Raúl Castro's grandson between GAESA, leaked luxuries and the first interview of 2026